DuoPlus cloud mobile phone has achieved a dual upgrade in "Renewal Management + Batch New Device Creation"
Introduction: In this new era of rapid change, every small shift can lead to new trends in the industry. DuoPlus Cloud …

Click here to visit DuoPlus’s official website for more information
In the wave of digitalization, we understand the ultimate pursuit of cloud phone performance by users. Today, let us take you through the basic features of the DuoPlus Cloud Phone and enjoy cross-border smart cloud services.
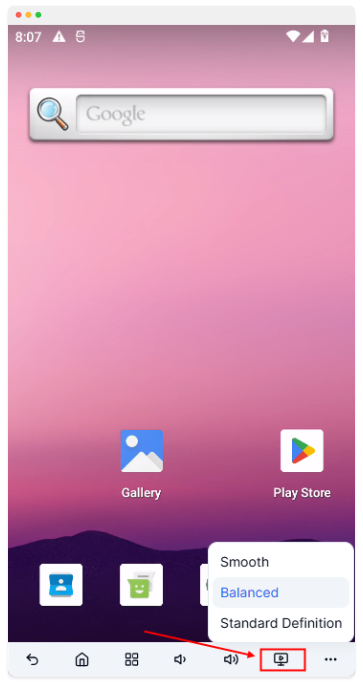
Due to the cloud phone data centers being overseas, some countries or regions may experience operational stutter or delay during peak cross-border traffic times. In such cases, you can choose to switch the streaming quality of the cloud phone.
If the situation does not improve after adjusting to smooth quality, you can turn on the accelerator on your computer or mobile device, choosing an overseas acceleration node close to the mainland.
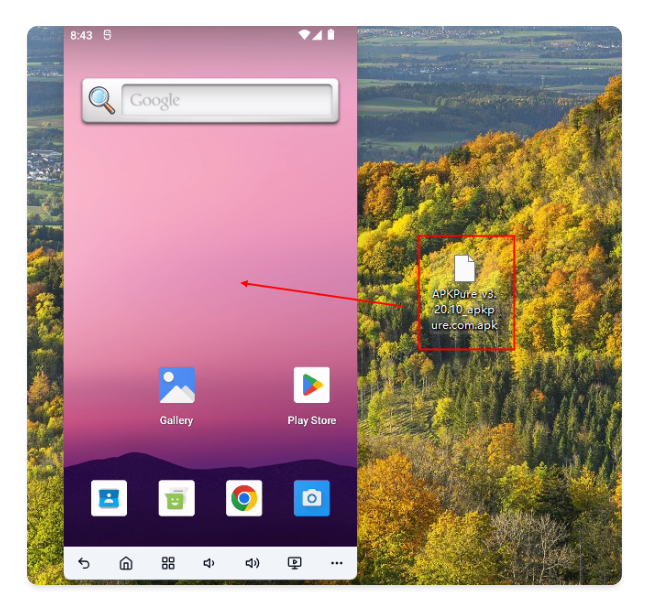
DuoPlus Cloud Phone supports uploading local files to the cloud phone.
1.1 Method One: Drag and drop
Simply drag the file into the cloud phone window.
Only one file can be uploaded at a time.
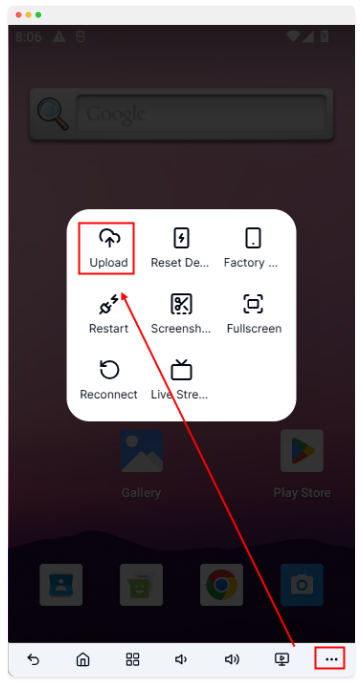
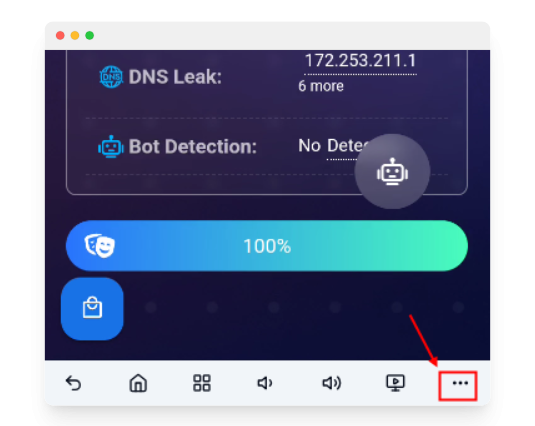
1.2 Method Two: Click the upload button
Click the three dots at the bottom right corner and select upload.
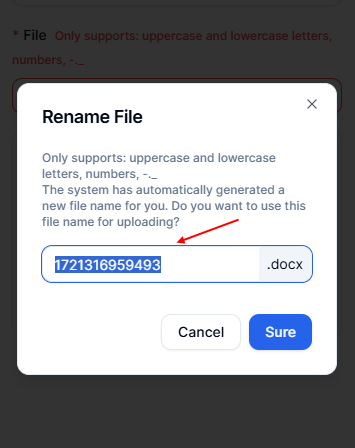
If the file name you upload does not meet the requirements, the system will automatically modify the file name, and you can manually edit the automatically generated file name here.
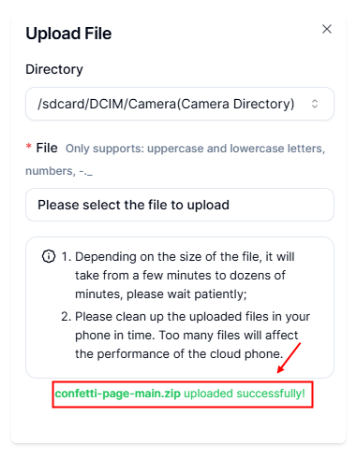
A success prompt will appear at the bottom after the upload is successful.
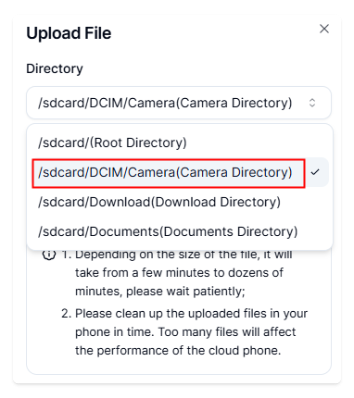
If the uploaded image or video needs to be read by TikTok, it should be uploaded to the album directory.
Note: If the file you uploaded is large, it may take about 30 seconds to 1 minute before you can view it in the cloud phone.
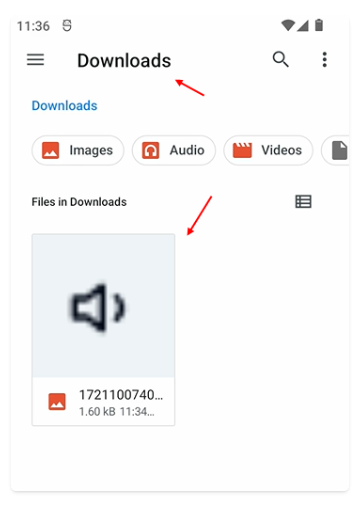
2.1 Downloads directory
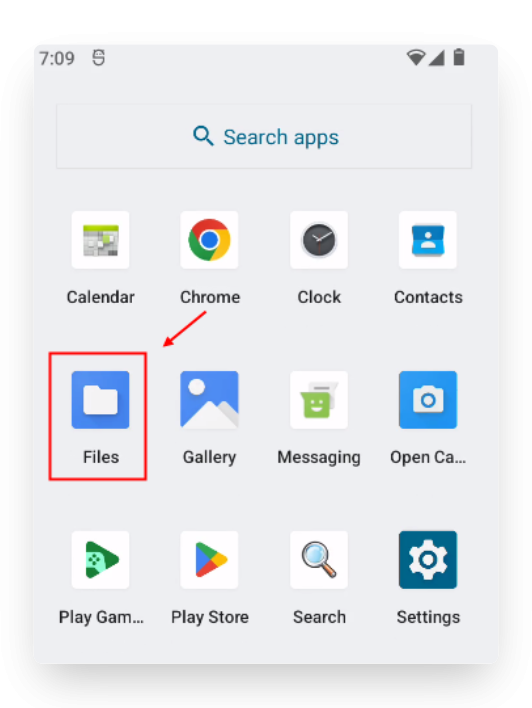
In the cloud phone, press and hold the left mouse button and slide up to bring up the search application page, select the Files app.

If you uploaded to the Downloads directory, you can directly see the file.
2.2 DCIM/Camera album directory
In the cloud phone, press and hold the left mouse button and slide up to bring up the search application page, select the Files app.

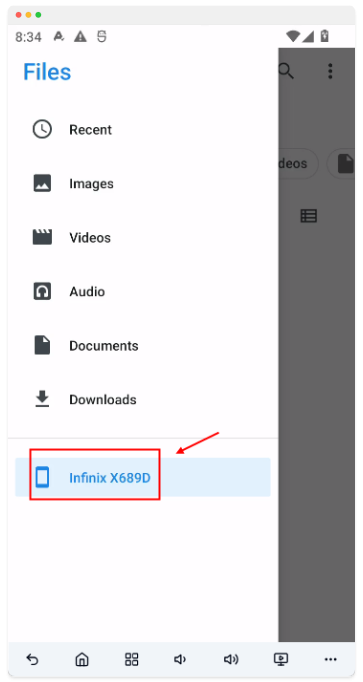
Enter the phone’s root directory.

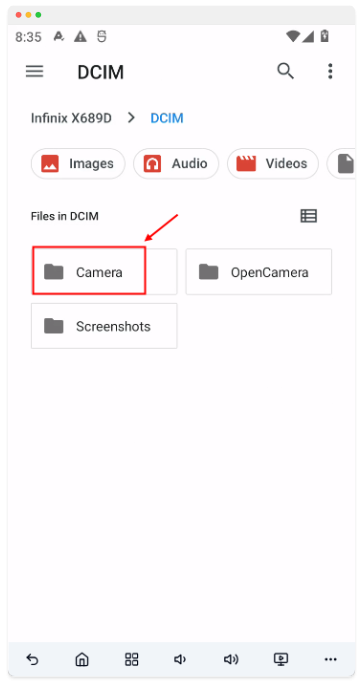
Enter the DCIM directory.
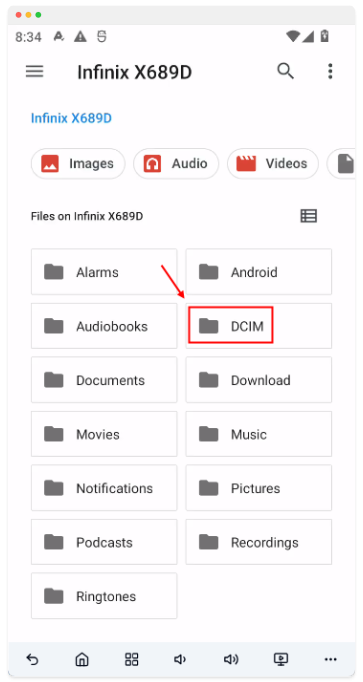
Enter the Camera directory, and you can see the file.
2.3 Root directory
In the cloud phone, press and hold the left mouse button and slide up to bring up the search application page, select the Files app.

Enter the phone’s root directory, and you can see the file.

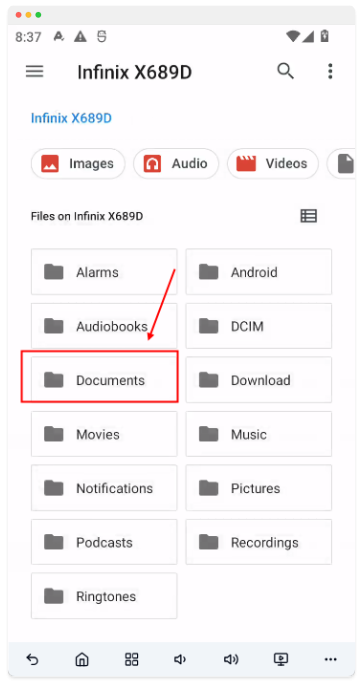
2.4 Documents directory
In the cloud phone, press and hold the left mouse button and slide up to bring up the search application page, select the Files app.
Enter the phone’s root directory.
Enter the Documents directory, and you can see the file.
DuoPlus can perform a one-click new device operation on a phone, which includes the following actions:
· Deletes all data on your phone
· Generates new device parameters based on your configured proxy IP
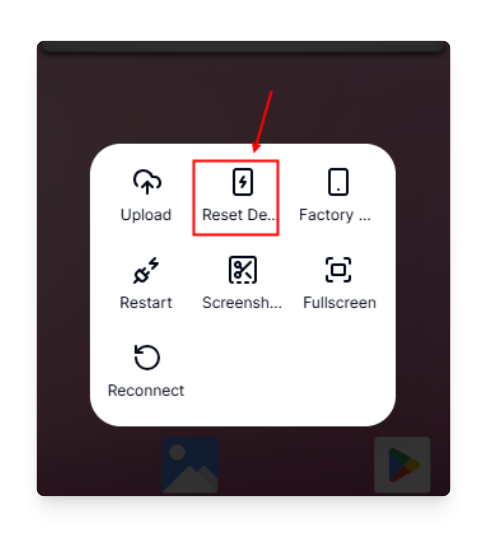
Each cloud phone has 10 free one-click new device opportunities.

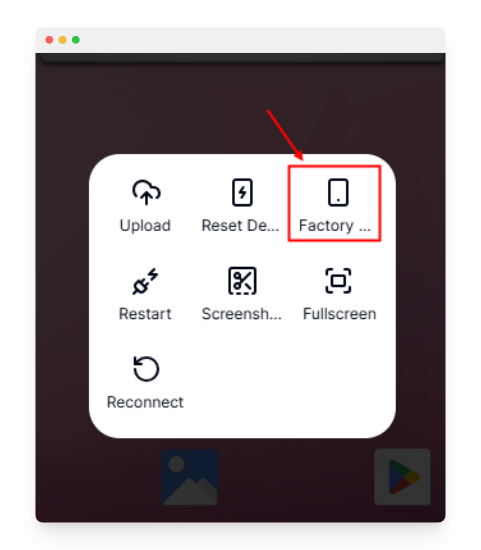
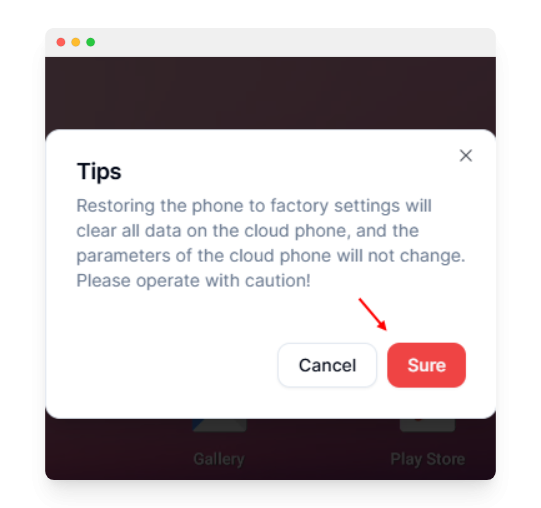
Factory reset will clear all data on the phone, but the device information will not be changed.

You can modify your phone’s proxy, GPS, SIM card, and timezone language information at any time.
In the cloud phone management menu, click the three dots.
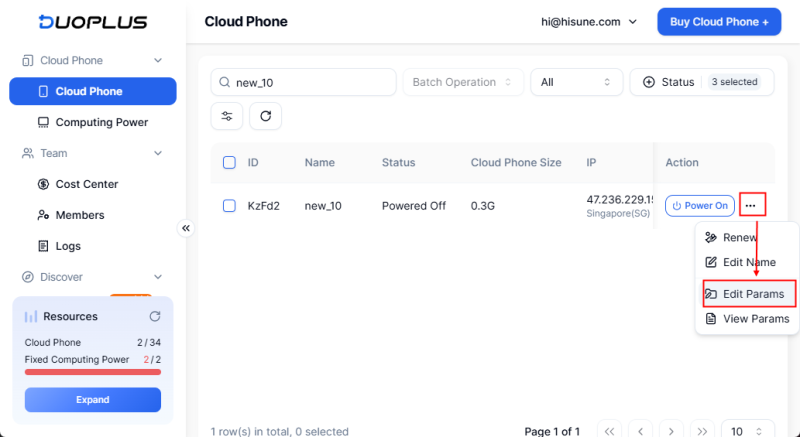
Then click “Modify Parameters”.
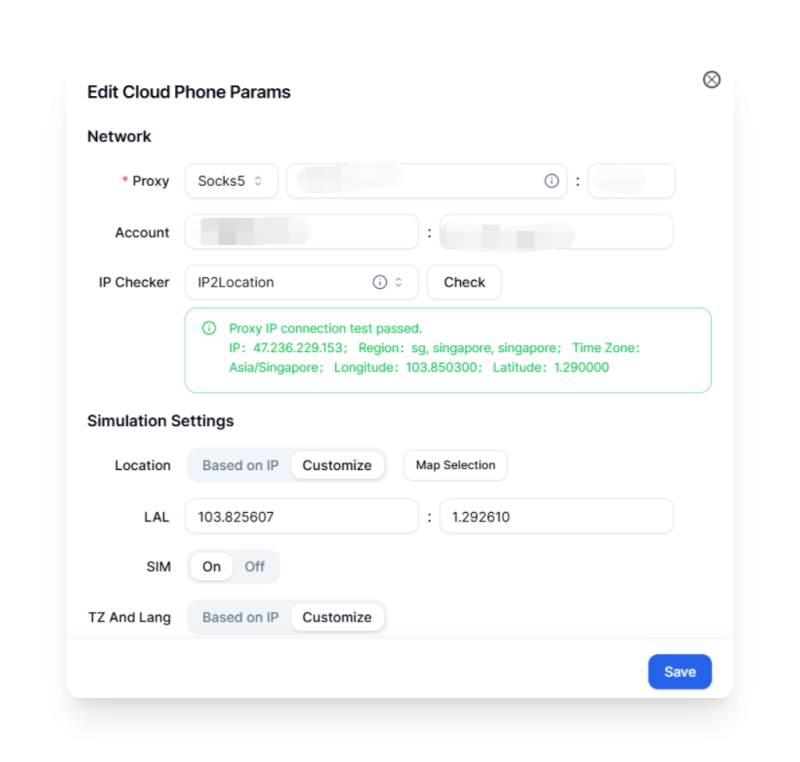
In the pop-up window, you can modify all parameter information.
Open Google Play on the cloud phone’s desktop, log in to your Google account, and download the app.

Open the browser in the cloud phone.
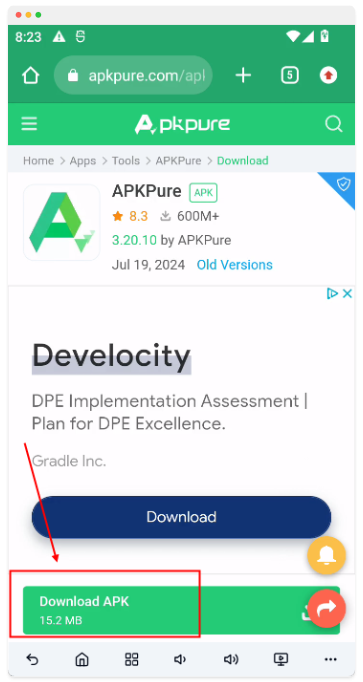
Visit the official download link of apkpure in the cloud phone’s browser and click download: https://apkpure.com/apkpure/com.apkpure.aegon/download
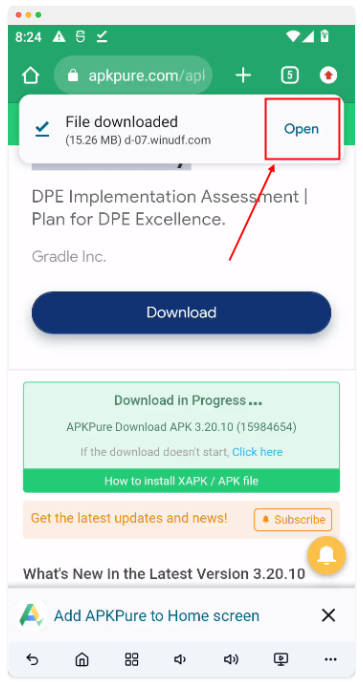
After the download is complete, open the apkpure installation package.
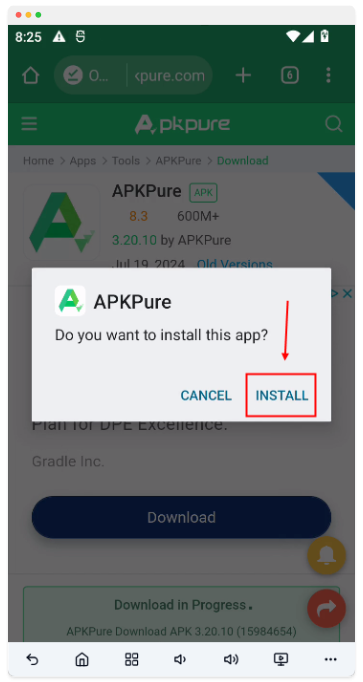
Install apkpure.
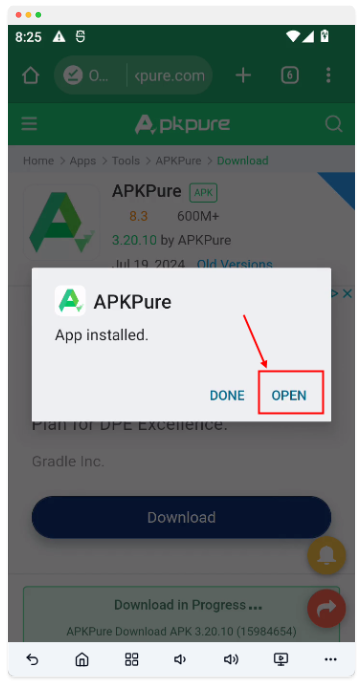
Open apkpure.
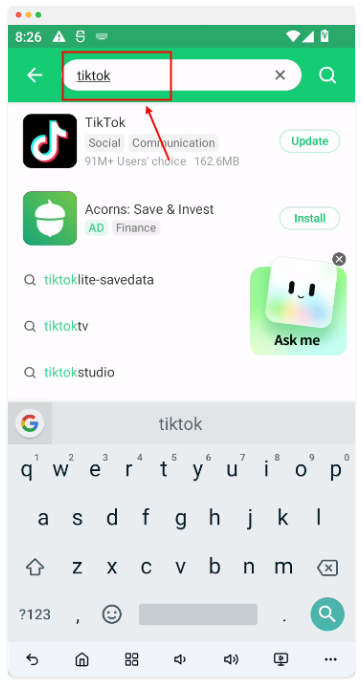
Search and install the app you need at the top.
3. Upload APK for installation
You can first download the APK file on your local computer, then upload it to the cloud phone.
Recommended third-party APK download websites:
For file upload-related content, please refer to the Upload File section.
4. Download and install APK in the cloud phone
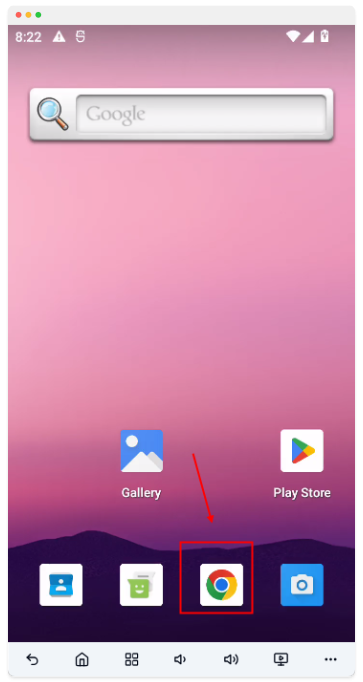
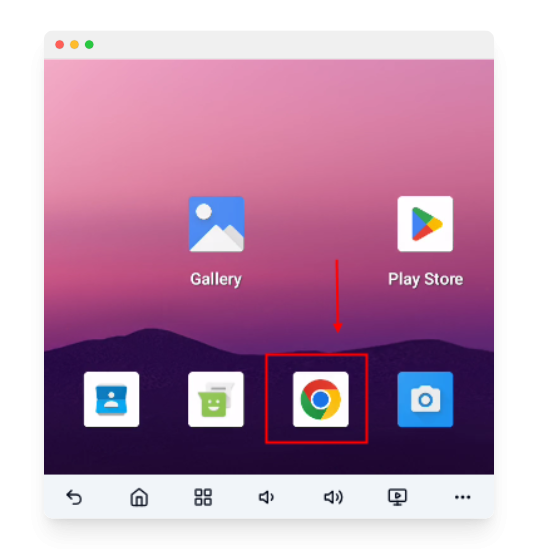
Open the Chrome browser on the cloud phone’s desktop, open a third-party APK download website, and download the installation.
Recommended third-party APK download websites:
DuoPlus Cloud Phone supports direct access to your device’s camera. You need to first enable the browser’s camera access settings. Through the browser, the DuoPlus Cloud Phone can conveniently use your computer or mobile’s camera device.
DuoPlus Cloud Phone also supports reading audio and video streams from your computer’s OBS streaming software, achieving 24-hour unattended live streaming. This tutorial uses OBS as an example to show how to use OBS streaming software with the cloud phone for unattended live streaming.
1. Install OBS on your computer
OBS is an open-source and free video recording and live streaming software. You can set up your video live stream source in OBS, then select OBS Virtual Camera as the video input device in your DuoPlus Cloud Phone.
· Official download address: https://obsproject.com/download
After downloading on your computer, install it directly.
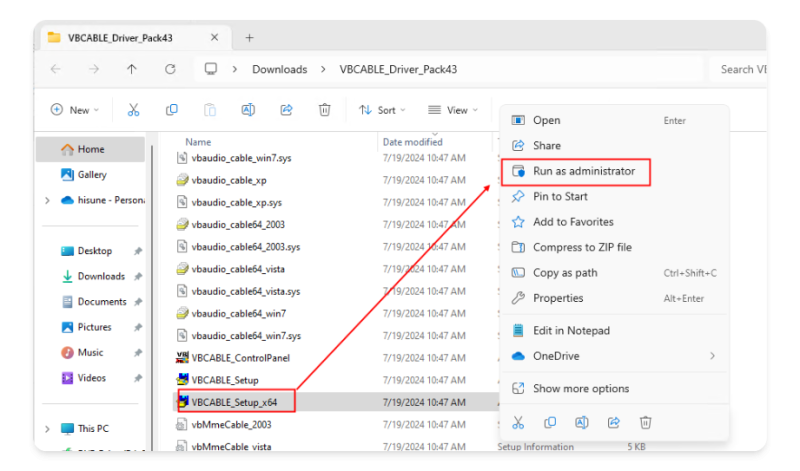
2. Install VB Audio on your computer
VB-Cable is a free virtual audio device that allows you to use any audio output as input to another application. You can set the audio output in OBS to VB-Cable, then select VB-Cable as the audio input device in your DuoPlus Cloud Phone.
· Official download address: https://vb-audio.com/Cable/
After downloading on your computer, you need to unzip the compressed file, then right-click -> Run as administrator to complete the installation.
3. OBS unattended live streaming settings
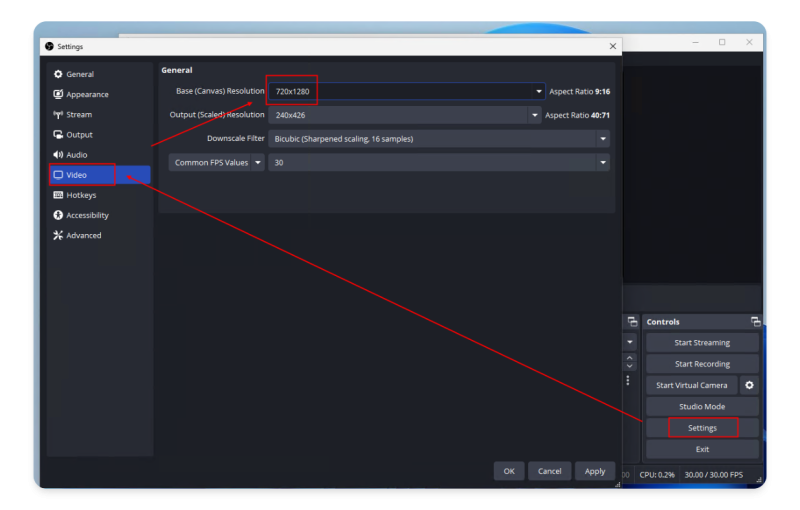
3.1 Set video and audio parameters
Open OBS installed on your computer, click “Settings” on the right -> Select “Video” -> Fill in 720x1280 in “Base (Canvas) Resolution” -> Confirm
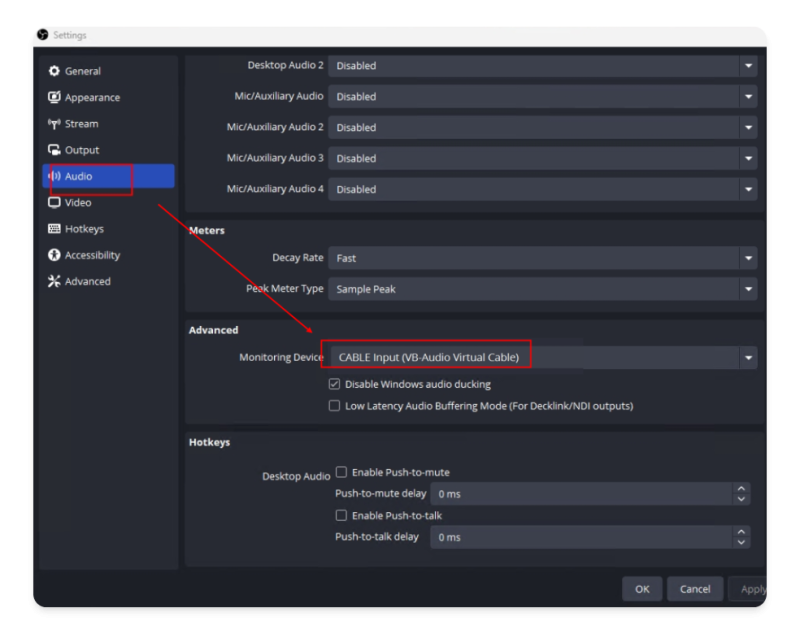
Select “Audio” -> “Advanced” -> In “Listening Device”, select “CABLE Input (VB-Audio Virtual Cable)”
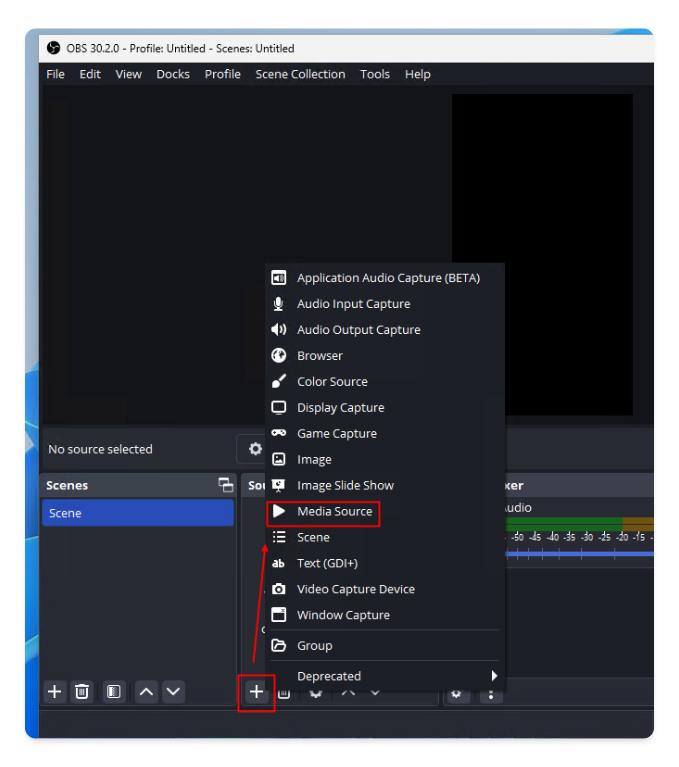
3.2 Add live stream source
Click the + sign under “Sources” at the bottom left -> Select “Media Source” -> The pop-up naming window can be left as default
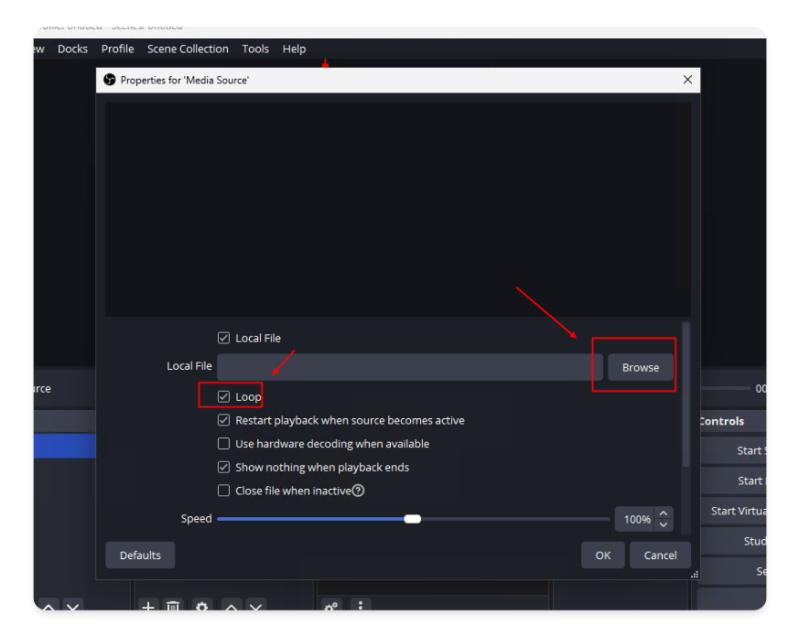
Check “Loop” -> Click the “Browse” button, select the video file you want to loop stream
Click confirm, adjust the position of the four corners in the preview box above
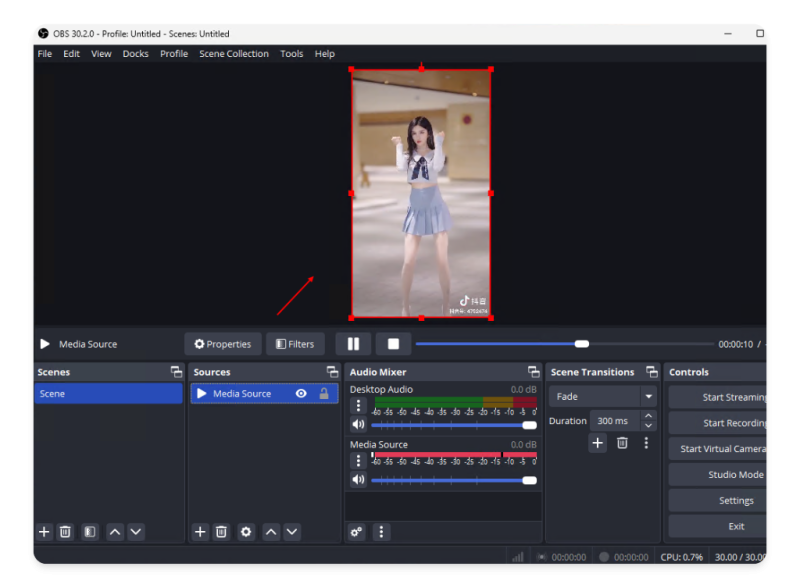
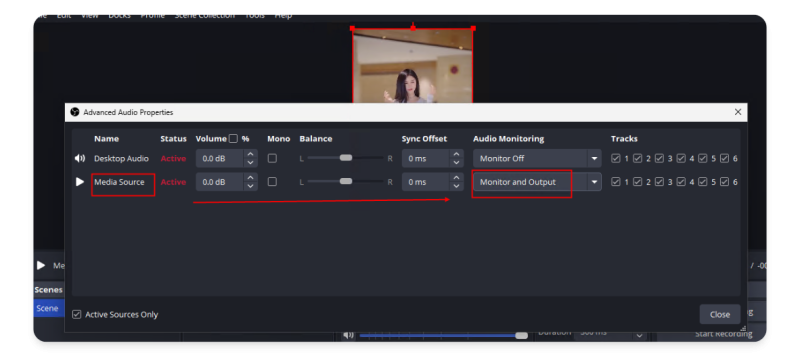
Click the three dots of the newly added media source -> Select “Advanced Audio Settings”
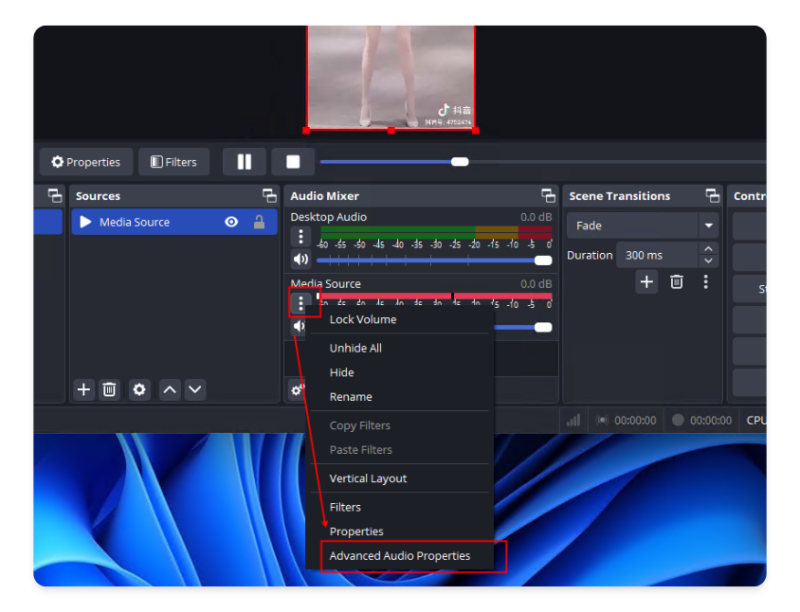
Select “Listen and Output”
In addition to adding a looping video file as a live stream source, you can also add other video sources as live stream sources, such as adding a camera as a live stream source during a real-person live stream
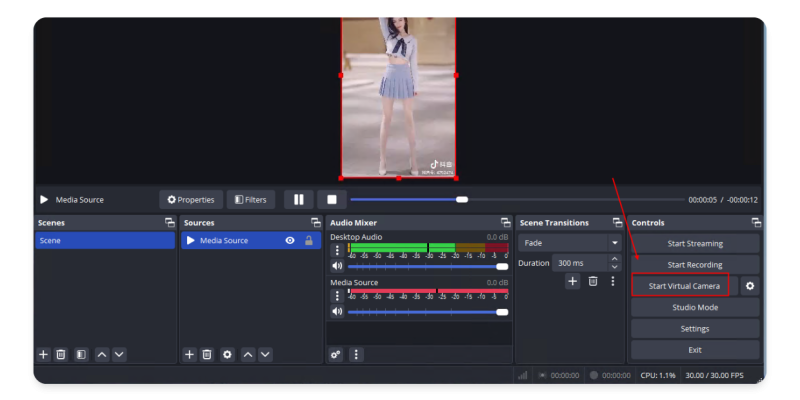
3.3 Start the virtual camera
Finally, click “Start Virtual Camera”
**4. DuoPlus Cloud Phone settings
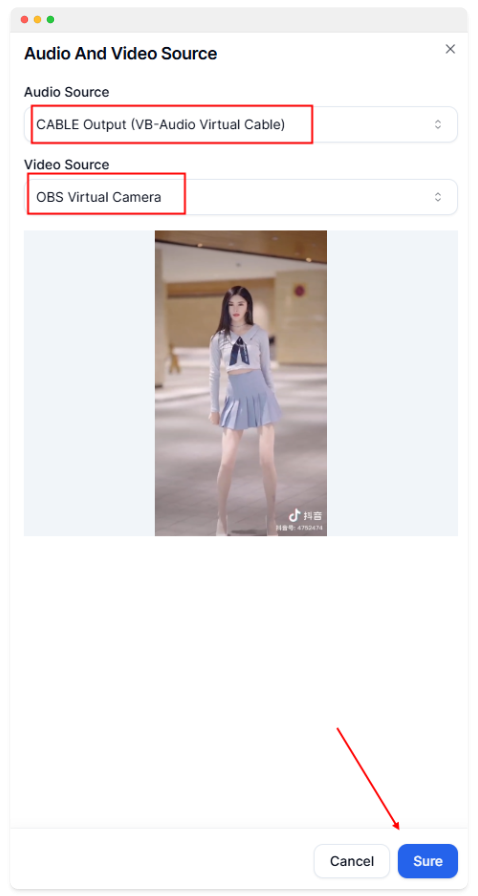
4.1 Select audio and video input devices**
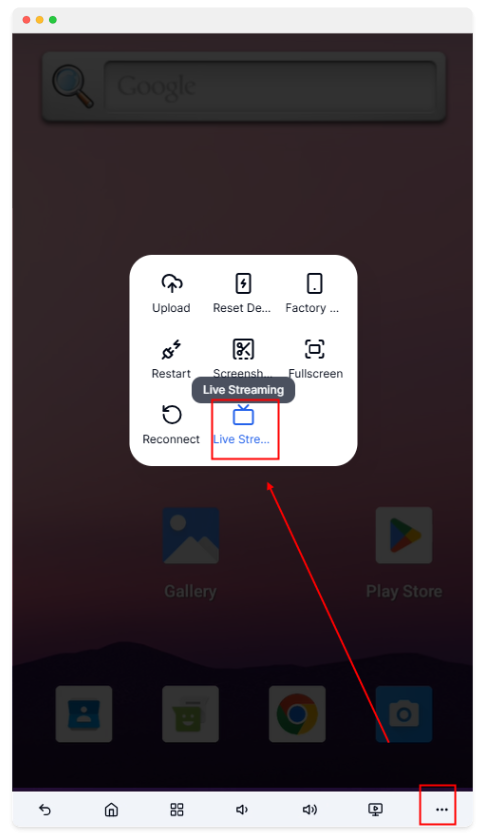
Open the DuoPlus Cloud Phone operation interface, click the three dots at the bottom right -> Click the “Live” button
Open the browser’s camera access permission
Select the audio source: CABLE Output (VB-Audio Virtual Cable) Select the video source: OBS Virtual Camera
4.2 Call the camera in the APP
Open the camera of the DuoPlus Cloud Phone, or TikTok’s camera, and you can see the OBS streaming screen

DuoPlus Cloud Phone can conveniently manage teams, and after inviting users to join your team, team members can use your cloud phone.
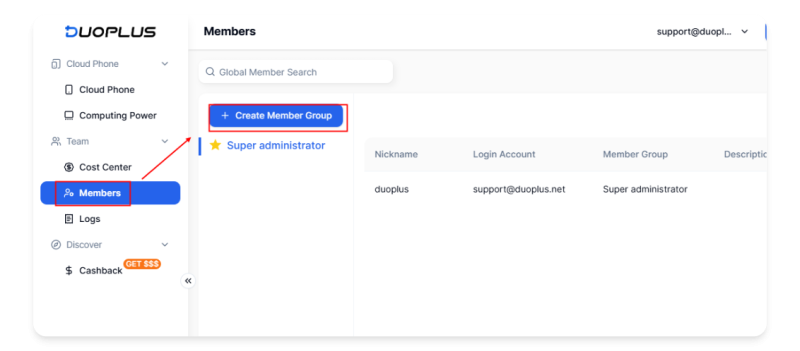
1. Create a user group
If you have not created a user group before, you need to create one first
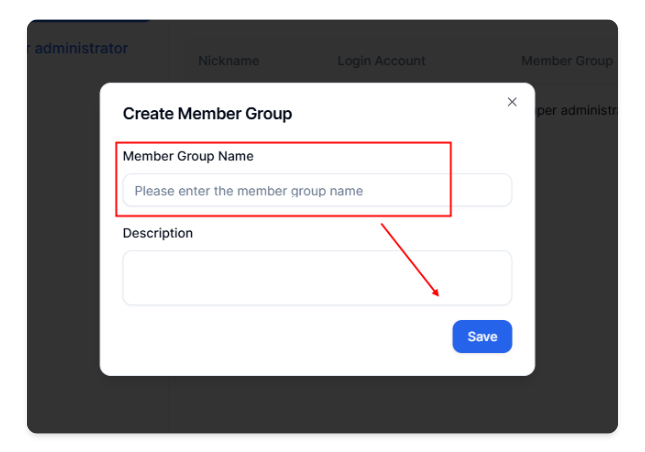
Enter a custom user group name, click save
2. Invite users
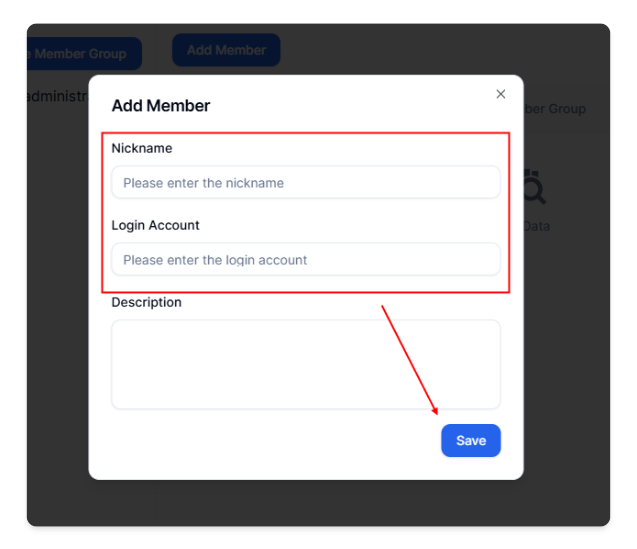
Click the user group created in the previous step, click “Add User”
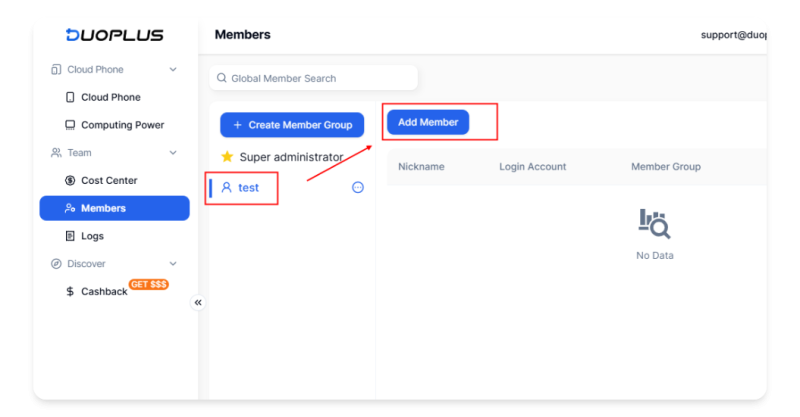
Nicknames can be entered arbitrarily, enter the other party’s email as the account name (the other party’s email must be registered with a duoplus account)
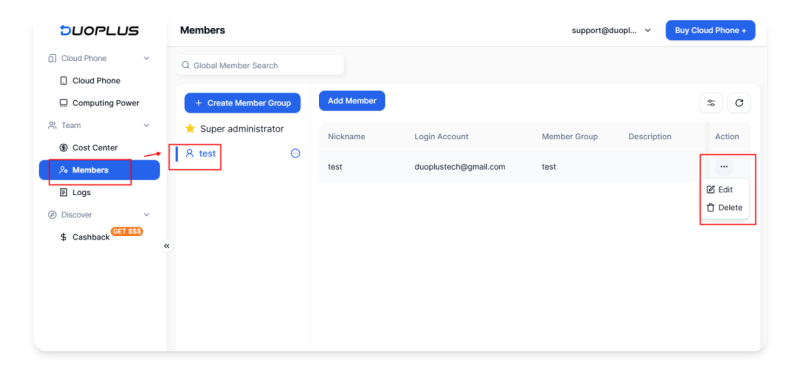
How can the inviter view team members?
Click “Member Management” -> Switch to the created team, and you can see all the members under your team in the member list, and manage the members on the right side of the list
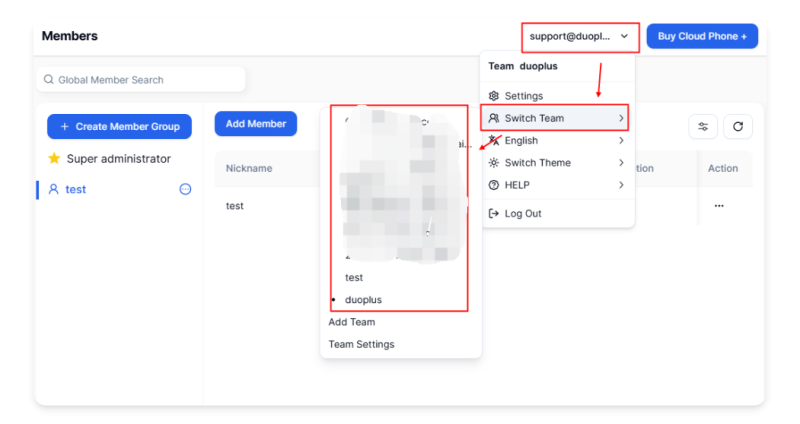
How can the invitee switch teams?
After completing the above two steps, the invitee has been added to your team and can use your cloud phone. The invitee can switch teams in the upper right corner, and after switching to the corresponding team, they can access the cloud phone resources of that team
The above is the introduction to the basic features of the DuoPlus Cloud Phone
Users who want to learn more are welcome to visit DuoPlus
DuoPlus New User Benefits:
Enter the link https://duoplus.saaslink.net/blogboke to register for a cloud mobile, receive a direct $2 credit to your account balance for immediate use! You can also follow the official account 【DuoPlus】 and add 【Xiao Mo Corporate WeChat】 to receive an additional exclusive discount code!
telegram:https://t.me/DuoPlus6
If you have any questions, please visit our help center: https://help.duoplus.net/
Introduction: In this new era of rapid change, every small shift can lead to new trends in the industry. DuoPlus Cloud …
DuoPlus Cloud Smartphone leads the technological trend, powered by Android 15 online! Specially designed for …
No need to purchase multiple real phones.
With DuoPlus, one person can operate numerous cloud phones and social media accounts from a single computer, driving traffic and boosting sales for you.
